In this section we will see how to use multiple images in laravel 9. For this tutorial we use laravel breeze and tailwind css We will store multiple images in text array format. For Upload Multiple Images Store we will use laravel File Storage.
How to update multiple images in laravel 9
Step 1: Install Laravel & Connect Database
Run below command to create laravel project.
composer create-project laravel/laravel multiple-images
Now, you have to connect the laravel app to the database, hence open the .env configuration file and add the database credentials as suggested below.
.env
DB_CONNECTION=mysql
DB_HOST=127.0.0.1
DB_PORT=3306
DB_DATABASE=database_name
DB_USERNAME=database_user_name
DB_PASSWORD=database_password
Step 2: Install Breeze
Install laravel breeze via composer:
composer require laravel/breeze --dev
Next, run below command.
php artisan breeze:install
And final install Dependencies
npm install && npm run dev
php artisan migrate
Step 3: Create Project Modal Migration and Controller
Run below command to create model, migration and controller
php artisan make:model Project -mcr
For multiple images give text method for long text and store multiple images.
create_projects_table.php
public function up()
{
    Schema::create('projects', function (Blueprint $table) {
        $table->id();
        $table->string('name');
        $table->text('images')->nullable();
        $table->timestamps();
    });
}
For multiple image give images casts to array.
app/Models/Project.php
<?php

namespace App\Models;

use Illuminate\Database\Eloquent\Factories\HasFactory;
use Illuminate\Database\Eloquent\Model;

class Project extends Model
{
    use HasFactory;

    protected $fillable = [
        'name',
        'images'
    ];

    protected $casts = [
        'images' => 'array'
    ];
}
web.php
Route::resource('projects', ProjectController::class);
We will store multiple images in array format. first you need to create empty array and run for each you can also you $request->hasFile('image')
app/Http/Controllers/projectController.php
<?php

namespace App\Http\Controllers;

use App\Models\Project;
use Illuminate\Http\Request;

class ProjectController extends Controller
{
    /**
     * Display a listing of the resource.
     *
     * @return \Illuminate\Http\Response
     */
    public function index()
    {
        $projects = Project::all();

        return view('projects.index', compact('projects'));
    }

    /**
     * Show the form for creating a new resource.
     *
     * @return \Illuminate\Http\Response
     */
    public function create()
    {
        return view('projects.create');
    }

    /**
     * Store a newly created resource in storage.
     *
     * @param  \Illuminate\Http\Request  $request
     * @return \Illuminate\Http\Response
     */
    public function store(Request $request)
    {
        $data = $request->validate([
            'name' => 'required|string|max:255',
            'images' => 'required|array'
        ]);

        $images = [];

        foreach ($data['images'] as $image) {
            $fileName = uniqid() . '.' . $image->getClientOriginalExtension();
            $image_path =  $image->storeAs('images', $fileName,'public');

            array_push($images, $image_path);
        }

        $data['images'] = $images;

        Project::create($data);
        return redirect()->route('projects.index');
    }

    /**
     * Display the specified resource.
     *
     * @param  \App\Models\Project  $project
     * @return \Illuminate\Http\Response
     */
    public function show(Project $project)
    {
        //
    }

    /**
     * Show the form for editing the specified resource.
     *
     * @param  \App\Models\Project  $project
     * @return \Illuminate\Http\Response
     */
    public function edit(Project $project)
    {
        //
    }

    /**
     * Update the specified resource in storage.
     *
     * @param  \Illuminate\Http\Request  $request
     * @param  \App\Models\Project  $project
     * @return \Illuminate\Http\Response
     */
    public function update(Request $request, Project $project)
    {
        //
    }

    /**
     * Remove the specified resource from storage.
     *
     * @param  \App\Models\Project  $project
     * @return \Illuminate\Http\Response
     */
    public function destroy(Project $project)
    {
        //
    }
}
Step 4: Storage link image
Run below command to link your public storage.
php artisan storage:link
Step 5: Create Project Blade View Files
You need to add enctype="multipart/form-data" in form also give images name in array images[] and add accept multiple input
resources/views/projects/create.blade.php
<x-app-layout>
    <x-slot name="header">
        <h2 class="text-xl font-semibold leading-tight text-gray-800">
            {{ __('Project Create') }}
        </h2>
    </x-slot>

    <div class="py-12">
        <div class="mx-auto max-w-7xl sm:px-6 lg:px-8">
            <div class="overflow-hidden bg-white shadow-sm sm:rounded-lg">
                <div class="p-6 bg-white border-b border-gray-200">
                    <form method="POST" action="{{ route('projects.store') }}" enctype="multipart/form-data">
                        @csrf
                        <div class="mb-6">
                            <label class="block">
                                <span class="text-gray-700">Name</span>
                                <input type="text" name="name"
                                    class="block w-full @error('name') border-red-500 @enderror mt-1 rounded-md"
                                    placeholder="" value="{{old('name')}}" />
                            </label>
                            @error('name')
                            <div class="text-sm text-red-600">{{ $message }}</div>
                            @enderror
                        </div>
                        <div class="mb-4">
                            <label class="block">
                                <span class="text-gray-700">Images</span>
                                <input type="file" name="images[]"
                                    class="block w-full mt-1 rounded-md"
                                    placeholder="" multiple/>
                            </label>
                            @error('images')
                            <div class="text-sm text-red-600">{{ $message }}</div>
                            @enderror
                        </div>
                        <button type="submit"
                            class="text-white bg-blue-600  rounded text-sm px-5 py-2.5">Submit</button>

                    </form>
                </div>
            </div>
        </div>
    </div>
</x-app-layout>
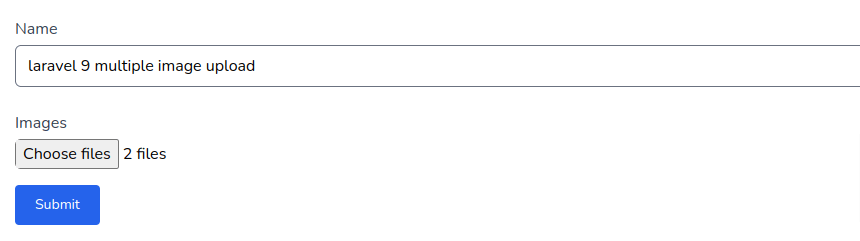
laravel 9 upload multiple images
Step 6: Show Multiple images in Blade View File
There are multiple ways you can show multiple image. We will use multiple foreach
resources/views/projects/index.blade.php
<x-app-layout>
    <x-slot name="header">
        <h2 class="text-xl font-semibold leading-tight text-gray-800">
            {{ __('Project') }}
        </h2>
    </x-slot>

    <div class="py-12">
        <div class="mx-auto max-w-7xl sm:px-6 lg:px-8">
            <div class="overflow-hidden bg-white shadow-sm sm:rounded-lg">
                <div class="p-6 bg-white border-b border-gray-200">
                    <div class="mt-1 mb-4">
                        <a class="px-2 py-2 text-sm text-white bg-blue-600 rounded"
                            href="{{ route('projects.create') }}">{{ __('Add Image') }}</a>
                    </div>
                    <div class="relative overflow-x-auto shadow-md sm:rounded-lg">
                        <table class="w-full text-sm text-left text-gray-500 dark:text-gray-400">
                            <thead
                                class="text-xs text-gray-700 uppercase bg-gray-50 dark:bg-gray-700 dark:text-gray-400">
                                <tr>
                                    <th scope="col" class="px-6 py-3">
                                        #
                                    </th>
                                    <th scope="col" class="px-6 py-3">
                                        Name
                                    </th>
                                    <th scope="col" class="px-6 py-3">
                                        Image
                                    </th>
                                </tr>
                            </thead>
                            <tbody>
                                @foreach ($projects as $project)
                                <tr class="bg-white border-b dark:bg-gray-800 dark:border-gray-700">
                                    <th scope="row"
                                        class="px-6 py-4 font-medium text-gray-900 dark:text-white whitespace-nowrap">
                                        {{$project->id}}
                                    </th>
                                    <td class="px-6 py-4">
                                        {{$project->name}}
                                    </td>
                                    <td class="flex gap-4 px-6 py-4">
                                        @foreach($project->images as $image)
                                        <img src="{{ asset('/storage/' . $image) }}" alt="multiple image"
                                            class="w-20 h-20 border border-blue-600">
                                        @endforeach
                                    </td>
                                </tr>
                                @endforeach

                            </tbody>
                        </table>
                    </div>

                </div>
            </div>
        </div>
    </div>
</x-app-layout>
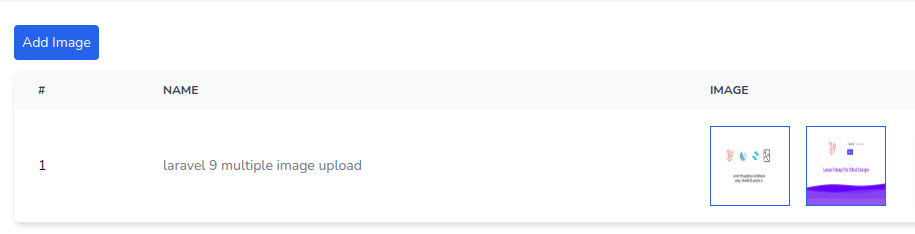
show multiple images in laravel 9
Read Also
Laravel 9 Upload Multiple Image Using Spatie Media Library
How To Upload Multiple Images In Laravel 9 With Intervention
Upload Images with Spatie Media Library in Laravel 9