In this tutorial, we will cover how to upload images in CKEditor 5 using Laravel, Vite, and Tailwind CSS. For this section, we will store the images in a local folder. If you are working on a small project, you can use this method; otherwise, you may consider using the Laravel Spatie Media Library.
Step 1: Setup Laravel Project with Ckeditor 5
First, you need to set up CKEditor 5 in Laravel. You can read the blog below for guidance.
How to Use Ckeditor 5 in Laravel with Tailwind CSS
Step 2: Create Image Upload Controller and Route
Run below command to create image upload controller.
php artisan make:controller ImageUploadControllerapp/Http/Controllers/ImageUploadController.php
<?php

namespace App\Http\Controllers;

use Illuminate\Http\Request;

class ImageUploadController extends Controller
{
    public function storeImage(Request $request)
    {
        if ($request->hasFile('upload')) {
            $originName = $request->file('upload')->getClientOriginalName();
            $fileName = pathinfo($originName, PATHINFO_FILENAME);
            $extension = $request->file('upload')->getClientOriginalExtension();
            $fileName = $fileName . '_' . time() . '.' . $extension;

            $request->file('upload')->move(public_path('media'), $fileName);

            $url = asset('media/' . $fileName);
            return response()->json(['fileName' => $fileName, 'uploaded'=> 1, 'url' => $url]);
        }
    }
}
Create image upload routes.
<?php

use App\Http\Controllers\ImageUploadController;
use App\Http\Controllers\PostController;
use Illuminate\Support\Facades\Route;

/*
|--------------------------------------------------------------------------
| Web Routes
|--------------------------------------------------------------------------
|
| Here is where you can register web routes for your application. These
| routes are loaded by the RouteServiceProvider within a group which
| contains the "web" middleware group. Now create something great!
|
*/

Route::get('/', function () {
    return view('welcome');
});

Route::get('/dashboard', function () {
    return view('dashboard');
})->middleware(['auth'])->name('dashboard');
Route::resource('posts', PostController::class);
Route::post('image-upload', [ImageUploadController::class, 'storeImage'])->name('image.upload');
require __DIR__ . '/auth.php';
Step 3: Add Image Upload Route Path in Ckeditor
Next, you need to add the image upload post URL in CKEditor.
view/posts/create.blade.php
<x-app-layout>
    <x-slot name="header">
        <h2 class="text-xl font-semibold leading-tight text-gray-800">
            {{ __('Post Create') }}
        </h2>
    </x-slot>

    <div class="py-12">
        <div class="mx-auto max-w-7xl sm:px-6 lg:px-8">
            <div class="overflow-hidden bg-white shadow-sm sm:rounded-lg">
                <div class="p-6 bg-white border-b border-gray-200">
                    <form method="POST" action="{{ route('posts.store') }}">
                        @csrf
                        <div class="mb-6">
                            <label class="block">
                                <span class="text-gray-700">Title</span>
                                <input type="text" name="title"
                                    class="block w-full @error('title') border-red-500 @enderror mt-1 rounded-md"
                                    placeholder="" value="{{old('title')}}" />
                            </label>
                            @error('title')
                            <div class="text-sm text-red-600">{{ $message }}</div>
                            @enderror
                        </div>
                        <div class="mb-6">
                            <label class="block">
                                <span class="text-gray-700">Slug</span>
                                <input type="text" name="slug"
                                    class="block w-full @error('slug') border-red-500 @enderror mt-1 rounded-md"
                                    placeholder="" value="{{old('slug')}}" />
                            </label>
                            @error('slug')
                            <div class="text-sm text-red-600">{{ $message }}</div>
                            @enderror
                        </div>
                        <div class="mb-6">
                            <label class="block">
                                <span class="text-gray-700">Description</span>
                                <textarea id="editor" class="block w-full mt-1 rounded-md" name="description"
                                    rows="3"></textarea>
                            </label>
                            @error('description')
                            <div class="text-sm text-red-600">{{ $message }}</div>
                            @enderror
                        </div>
                        <button type="submit"
                            class="text-white bg-blue-600  rounded text-sm px-5 py-2.5">Submit</button>

                    </form>
                </div>
            </div>
        </div>
    </div>
    @push('scripts')
    <script src="https://cdn.ckeditor.com/ckeditor5/34.2.0/classic/ckeditor.js"></script>
    <script>
        ClassicEditor
            .create( document.querySelector( '#editor' ),{
                ckfinder: {
                    uploadUrl: '{{route('image.upload').'?_token='.csrf_token()}}',
        }
            })
            .catch( error => {
                console.error( error );
            } );
    </script>
    @endpush
</x-app-layout>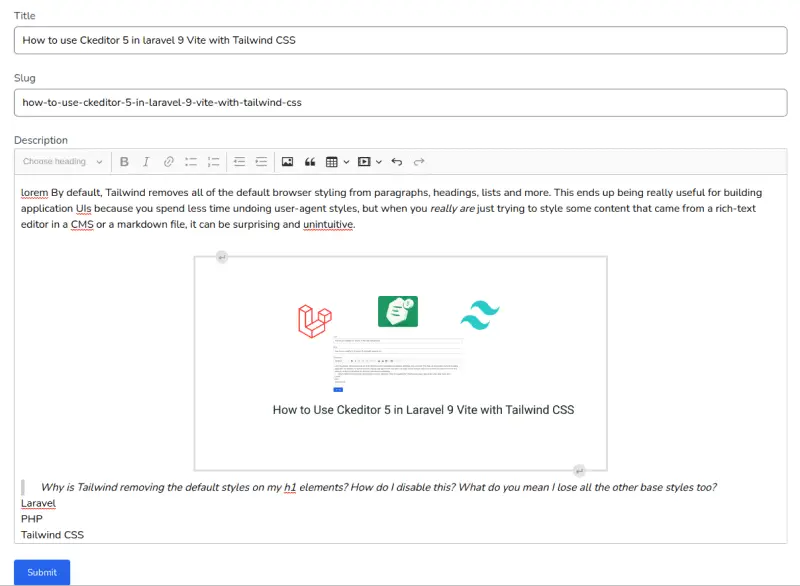
Step 4: Test Ckeditor Image Upload
view/posts/show.blade.php
<x-app-layout>
    <x-slot name="header">
        <h2 class="text-xl font-semibold leading-tight text-gray-800">
            {{ __('Posts Show') }}
        </h2>
    </x-slot>

    <div class="py-12">
        <div class="max-w-4xl mx-auto sm:px-6 lg:px-8">
            <div class="overflow-hidden bg-white shadow-sm sm:rounded-lg">
                <div class="p-6 bg-white border-b border-gray-200">

                    <div>
                        <h1 class="text-2xl">{{ $post->title }}</h1>
                        <div class="prose lg:prose-xl">{!! $post->description !!}</div>
                    </div>

                </div>
            </div>
        </div>
    </div>

</x-app-layout>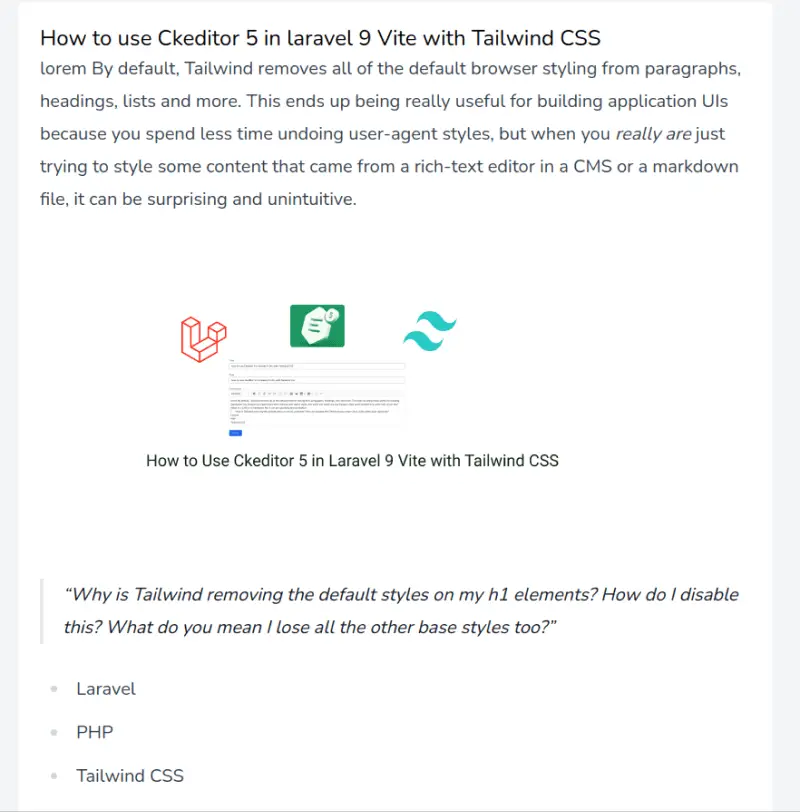
Step 5: Run the server
run vite build
npm run dev
# or
npm run build
run laravel server.
php artisan serve