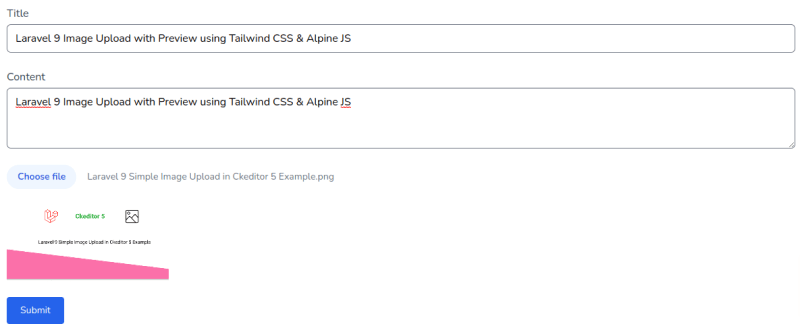
In this section we will see preview image before uploading using laravel with tailwind css & alpinejs. If you are start new project then you should install laravel breeze it come all three them. You can also read below article.
How to Upload Image with Preview in Tailwind CSS & ApineJS
Create Laravel Project
Run below command in your terminal to create laravel project.
composer create-project --prefer-dist laravel/laravel laravel-image Install laravel Breeze or setup laravel with tailwind css alpine js.
Create Blog Model Controller and routes
Run below command to create blog modal migration and controller.
php artisan make:model Blog -mcr create_blogs_table.php
public function up()
{
    Schema::create('blogs', function (Blueprint $table) {
        $table->id();
        $table->string('title');
        $table->text('content');
        $table->string('image')->nullable();
        $table->timestamps();
    });
}
Models/Blog.php
<?php

namespace App\Models;

use Illuminate\Database\Eloquent\Factories\HasFactory;
use Illuminate\Database\Eloquent\Model;

class Blog extends Model
{
    use HasFactory;

    protected $fillable = [
        'title',
        'content',
        'image'
    ];
}
Validate Image and store.
app/Http/Controllers/BlogController.php
<?php

namespace App\Http\Controllers;

use App\Models\Blog;
use Illuminate\Http\Request;

class BlogController extends Controller
{
    /**
     * Display a listing of the resource.
     *
     * @return \Illuminate\Http\Response
     */
    public function index()
    {
        $blogs = Blog::all();

        return view('blogs.index', compact('blogs'));
    }

    /**
     * Show the form for creating a new resource.
     *
     * @return \Illuminate\Http\Response
     */
    public function create()
    {
        return view('blogs.create');
    }

    /**
     * Store a newly created resource in storage.
     *
     * @param  \Illuminate\Http\Request  $request
     * @return \Illuminate\Http\Response
     */
    public function store(Request $request)
    {
        $request->validate([
            'title' => 'required|string|max:255',
            'content' => 'required',
            'image' => 'nullable|image|mimes:jpg,png,jpeg,gif,svg|max:2048'
        ]);
        $image_path = '';
        if ($request->hasFile('image')) {
            $image_path = $request->file('image')->store('image', 'public');
        }
        Blog::create([
            'title' => $request->title,
            'content' => $request->content,
            'image' => $image_path,
        ]);
        return redirect()->route('blogs.index')->with('message', 'Blog Created Successfully');
    }
}
Now you need to create routes in web.php
Route::resource('blogs', BlogController::class);Create Preview Image Before Uploading Laravel Tailwind CSS and AlpineJS
First you need to setup @stack(‘scripts’) in your main blade file.
layouts/app.blade.php
<!DOCTYPE html>
<html lang="{{ str_replace('_', '-', app()->getLocale()) }}">

    <head>
        <meta charset="utf-8">
        <meta name="viewport" content="width=device-width, initial-scale=1">
        <meta name="csrf-token" content="{{ csrf_token() }}">

        <title>{{ config('app.name', 'Laravel') }}</title>

        <!-- Fonts -->
        <link rel="stylesheet" href="https://fonts.googleapis.com/css2?family=Nunito:wght@400;600;700&display=swap">
        @stack('styles')
        <!-- Scripts -->
        @vite(['resources/css/app.css', 'resources/js/app.js'])

    </head>

    <body class="font-sans antialiased">
        <div class="min-h-screen bg-gray-100">
            @include('layouts.navigation')

            <!-- Page Heading -->
            <header class="bg-white shadow">
                <div class="px-4 py-6 mx-auto max-w-7xl sm:px-6 lg:px-8">
                    {{ $header }}
                </div>
            </header>

            <!-- Page Content -->
            <main>
                {{ $slot }}
            </main>
        </div>
        @stack('scripts')
    </body>

</html>
Next you need to add @push(‘scripts’) in you blade file.
blogs/create.blade.php
<x-app-layout>
    <x-slot name="header">
        <h2 class="text-xl font-semibold leading-tight text-gray-800">
            {{ __('Blogs Create') }}
        </h2>
    </x-slot>

    <div class="py-12">
        <div class="mx-auto max-w-7xl sm:px-6 lg:px-8">
            <div class="overflow-hidden bg-white shadow-sm sm:rounded-lg">
                <div class="p-6 bg-white border-b border-gray-200">
                    <form method="POST" action="{{ route('blogs.store') }}" enctype="multipart/form-data">
                        @csrf
                        <div class="mb-6">
                            <label class="block">
                                <span class="text-gray-700 @error('title') text-red-500 @enderror">Title</span>
                                <input type="text" name="title"
                                    class="block @error('title') border-red-500 bg-red-100 text-red-900 @enderror w-full mt-1 rounded-md"
                                    placeholder="" value="{{old('title')}}" />
                            </label>
                            @error('title')
                            <div class="flex items-center text-sm text-red-600">
                                {{ $message }}

                            </div>
                            @enderror
                        </div>
                        <div class="mb-6">
                            <label class="block">
                                <span class="text-gray-700 @error('content') text-red-500 @enderror">Content</span>
                                <textarea
                                    class="block @error('content') border-red-500  bg-red-100 text-red-900 @enderror w-full mt-1 rounded-md"
                                    name="content" rows="3">{{old('content')}}</textarea>
                            </label>
                            @error('content')
                            <div class="flex items-center text-sm text-red-600">
                                {{ $message }}
                            </div>
                            @enderror
                        </div>
                        <div class="mb-6">
                            <label class="block" x-data="showImage()">
                                <span class="sr-only">Choose File</span>
                                <input type="file" name="image" @change="showPreview(event)"
                                    class="block w-full text-sm text-gray-500 file:mr-4 file:py-2 file:px-4 file:rounded-full file:border-0 file:font-semibold file:bg-blue-50 file:text-blue-700 hover:file:bg-blue-100" />
                                <img id="preview" class="object-cover h-32 mt-2 w-60">
                            </label>
                            @error('image')
                            <div class="flex items-center text-sm text-red-600">
                                {{ $message }}

                            </div>
                            @enderror
                        </div>
                        <button type="submit"
                            class="text-white bg-blue-600  rounded text-sm px-5 py-2.5">Submit</button>

                    </form>
                </div>
            </div>
        </div>
    </div>
    @push('scripts')
    <script>
        function showImage() {
            return {
                showPreview(event) {
                    if (event.target.files.length > 0) {
                        var src = URL.createObjectURL(event.target.files[0]);
                        var preview = document.getElementById("preview");
                        preview.src = src;
                        preview.style.display = "block";
                    }
                }
            }
        }
    </script>
    @endpush
</x-app-layout>