in this tutorial you will see how to install inertia js in laravel 8 with vue 3 . Inertia is a new approach to building SPA(Single page Application) for web. Inertia has no client-side routing, nor does it require an API. Simply build controllers and page views like you've always done.
Create Laravel Project
Installing a fresh laravel project, so head over to the terminal, type the command, and create a new laravel app.
composer create-project --prefer-dist laravel/laravel inertia-vue
*** Server Side Setup ****
There is two type of setup to install inertia server side and client side . you need to setup first to server side.
Install dependencies
composer require inertiajs/inertia-laravel
Set Up Root template
Next , you need to remove the welcome.blade.php or rename the app.blade.php . then put the code in below
<!DOCTYPE html>
<html>
  <head>
    <meta charset="utf-8" />
    <meta name="viewport" content="width=device-width, initial-scale=1.0, maximum-scale=1.0" />
    <link href="{{ mix('/css/app.css') }}" rel="stylesheet" />
    <script src="{{ mix('/js/app.js') }}" defer></script>
  </head>
  <body>
    @inertia
  </body>
</html>
Create Middleware
Then, you need to create midddleware
php artisan inertia:middleware
Once generated, register the HandleInertiaRequests middleware in your App\Http\Kernel, as the last item in your web middleware group.
'web' => [
    // ...
    \App\Http\Middleware\HandleInertiaRequests::class,
],
*** Client Side Setup ****
Once server side setup is done. you need to start config on client side.
Install dependencies
Install the Inertia client-side using NPM with vue 3
npm install @inertiajs/inertia @inertiajs/inertia-vue3
Then, install vue 3
npm install vue@next
After, or later install full node package. then you can setup your code
npm install
you need to also install Progress indicator
npm install @inertiajs/progress
Once all command are done then . you need to setup your code.
Initialize App
Next, update your main JavaScript file resources/js/app.js e just like you did before remove code and paste below the code.
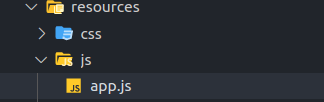
Inertia js in Laravel 8 with Vue 3 folder
import { createApp, h } from "vue";
import { createInertiaApp } from "@inertiajs/inertia-vue3";
import { InertiaProgress } from "@inertiajs/progress";

InertiaProgress.init();

createInertiaApp({
    resolve: (name) => require(`./Pages/${name}`),
    setup({ el, App, props, plugin }) {
        createApp({ render: () => h(App, props) })
            .use(plugin)
            .mount(el);
    },
});
This above code as you can see Pages Folder are name is already define. that way you need to create folder name Pages , you can change the page name if you need. also you can see a already import the progress class.
webpack.mix.js
Next, you need to config setup the webpack
const mix = require("laravel-mix");

/*
 |--------------------------------------------------------------------------
 | Mix Asset Management
 |--------------------------------------------------------------------------
 |
 | Mix provides a clean, fluent API for defining some Webpack build steps
 | for your Laravel applications. By default, we are compiling the CSS
 | file for the application as well as bundling up all the JS files.
 |
 */

mix.js("resources/js/app.js", "public/js")
    .vue()
    .postCss("resources/css/app.css", "public/css", [
        //
    ]);

mix.webpackConfig({
    output: {
        chunkFilename: "js/[name].js?id=[chunkhash]",
    },
});
Create Routes
app/routes/web.php
It is look like typical laravel routes the difference is not to view it render the page
<?php

use Illuminate\Support\Facades\Route;
use Inertia\Inertia;
/*
|--------------------------------------------------------------------------
| Web Routes
|--------------------------------------------------------------------------
|
| Here is where you can register web routes for your application. These
| routes are loaded by the RouteServiceProvider within a group which
| contains the "web" middleware group. Now create something great!
|
*/

Route::get('/', function () {
    return Inertia::render('Home', ['test' => 'working']);
});

Route::get('/about-us', function () {
    return Inertia::render('About', ['about_us' => 'working']);
});
Set Up Front End
After create routes, then we need to show the data in front end side . first you need to create Pages Folder ,then after create Home.vue or other file you want.
Home.vue
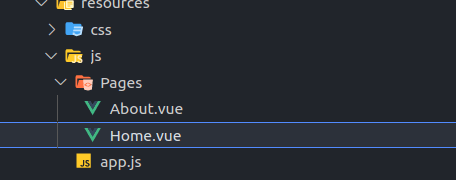
Inertia js in Laravel 8 with Vue 3 folder v2
<template>
    <div>
        <h1>Inertiajs is {{ test }}</h1>

        <Link href="/about-us">Go to about us</Link>
    </div>
</template>

<script>
import { Link } from "@inertiajs/inertia-vue3";
export default {
    components: {
        Link,
    },
    props: ["test"],
};
</script>
About.vue
<template>
    <div>
        <h1>inertiajs is {{ about_us }}</h1>

        <Link href="/">Go to Home</Link>
    </div>
</template>

<script>
import { Link } from "@inertiajs/inertia-vue3";
export default {
    components: {
        Link,
        props: ["about_us"],
    },
};
</script>
And Final run dev command
npm run dev
  Laravel Mix v6.0.27


✔ Compiled Successfully in 1316ms
┌───────────────────────────────────────────────────────────────────────────────────────────────┬─────────┐
│                                             File │ Size  │
├───────────────────────────────────────────────────────────────────────────────────────────────┼─────────┤
│                                          /js/app.js │ 974 KiB │
│                                          css/app.css │ 1 bytes │
└───────────────────────────────────────────────────────────────────────────────────────────────┴─────────┘
webpack compiled successfully
Or if you want to watch command
npm run watch

Inertia js in Laravel 8 with Vue 3
Note: if you want start your new project with inertiajs with v3. Then simply install breeze, at this time breeze start kit come with vue3
Breeze & Inertiajs vue3
create project
composer create-project --prefer-dist laravel/laravel bleez-v3
Install laravel breeze via composer
composer require laravel/breeze --dev
Next, run below command
php artisan breeze:install
install breeze with vue 3
php artisan breeze:install vue
And final install Dependencies
npm install && npm run dev
Done...
Check your package.json file
{
    "private": true,
    "scripts": {
        "dev": "npm run development",
        "development": "mix",
        "watch": "mix watch",
        "watch-poll": "mix watch -- --watch-options-poll=1000",
        "hot": "mix watch --hot",
        "prod": "npm run production",
        "production": "mix --production"
    },
    "devDependencies": {
        "@inertiajs/inertia": "^0.10.0",
        "@inertiajs/inertia-vue3": "^0.5.1",
        "@inertiajs/progress": "^0.2.6",
        "@tailwindcss/forms": "^0.2.1",
        "@vue/compiler-sfc": "^3.0.5",
        "alpinejs": "^2.7.3",
        "autoprefixer": "^10.2.4",
        "axios": "^0.21",
        "laravel-mix": "^6.0.6",
        "lodash": "^4.17.19",
        "postcss": "^8.2.13",
        "postcss-import": "^14.0.1",
        "tailwindcss": "^2.1.2",
        "vue": "^3.0.5",
        "vue-loader": "^16.1.2"
    }
}
Related Posts
👉 How to install Inertia js in Laravel with React JS, Tailwind CSS
👉 Laravel 8 CRUD with Inertia Js Using Vue 3 Example
👉 Laravel 8 Image File Upload With Inertia Js Vue 3 Example
👉 Laravel 8 Inertia Js Pagination with Vue 3 Using Breeze
Read also
👉 How to Install Tailwind CSS in Vue 3
👉 Tailwind CSS Vue 3 Modal Examples
👉 Vue 3 Dropdown With Tailwind CSS Examples
👉 Build A Simple Tabs with Tailwind CSS & Vue 3
👉 Vue 3 Responsive Navbar Menu With Tailwind CSS Example
👉 Building Reusable Vue 3 Button Component Using Tailwind CSS